 There's nothing quite so rewarding as home made cheese from a hand milked cow out over the yard. It's quite easy to make small amounts of cheese at home, we've experimented with various soft & hard cheeses and even if you don't happen to have a cow it's very easy to make with good milk from a farmer or store. 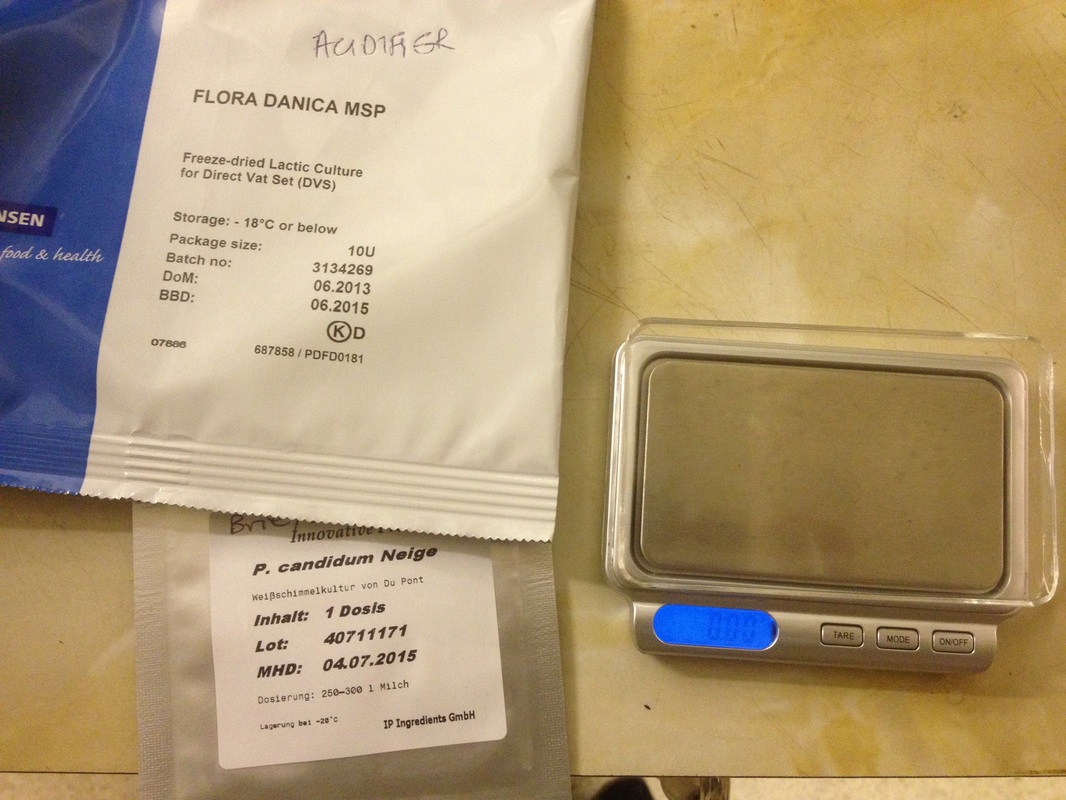 The process is simple, if a little more time consuming than other cheeses. We are using a Mesophillic bacterial culture to both acidify the milk and influence flavour. This culture has 4 bacteria friends — 2 which seem to primarily drive the acidification (Lactococcus lactis subsp. lactis, Lactococcus lactis subsp. cremoris) and 2 which drive the flavor production (Lactococcus lactis subsp. lactis biovar diacetylactis, Leuconostoc mesenteroides subsp. cremoris). For Brie & Camembert you also need the white mould which flavours & protects the cheese, in this case Penicillium candidum neige.  You heat the milk up to 32°C (the target temperature throughout the process) Once you reach the heat you stir in both sets of organisms following recommended dosages. You have to stir really well to ensure good distribution throughout the milk. Make sure you take the milk off the heat, it will hold it's temperature well. You leave this for 90 mins to ripen then stir in the rennet, again ensuring you mix everything very well, 1 or 2 mins is fine. 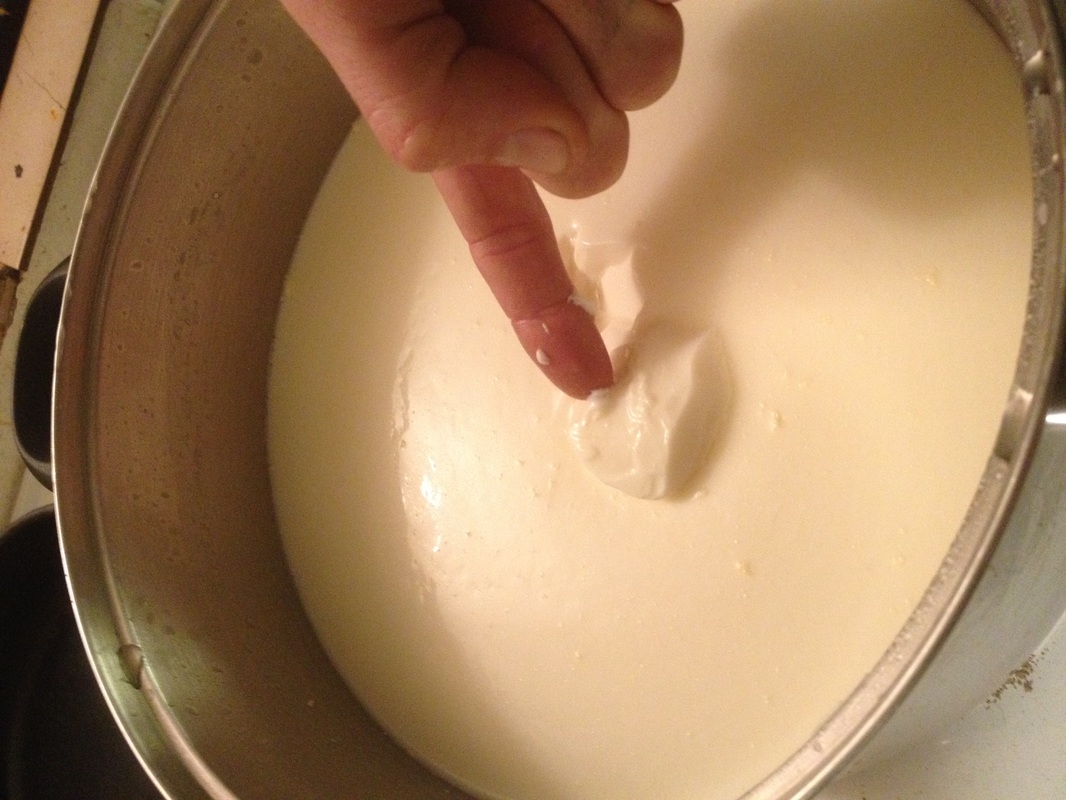 After 1 hr you can check the curd for a "clean break" by inserting a clean finger and pulling upwards; the curds should break cleanly at the top like you see above. 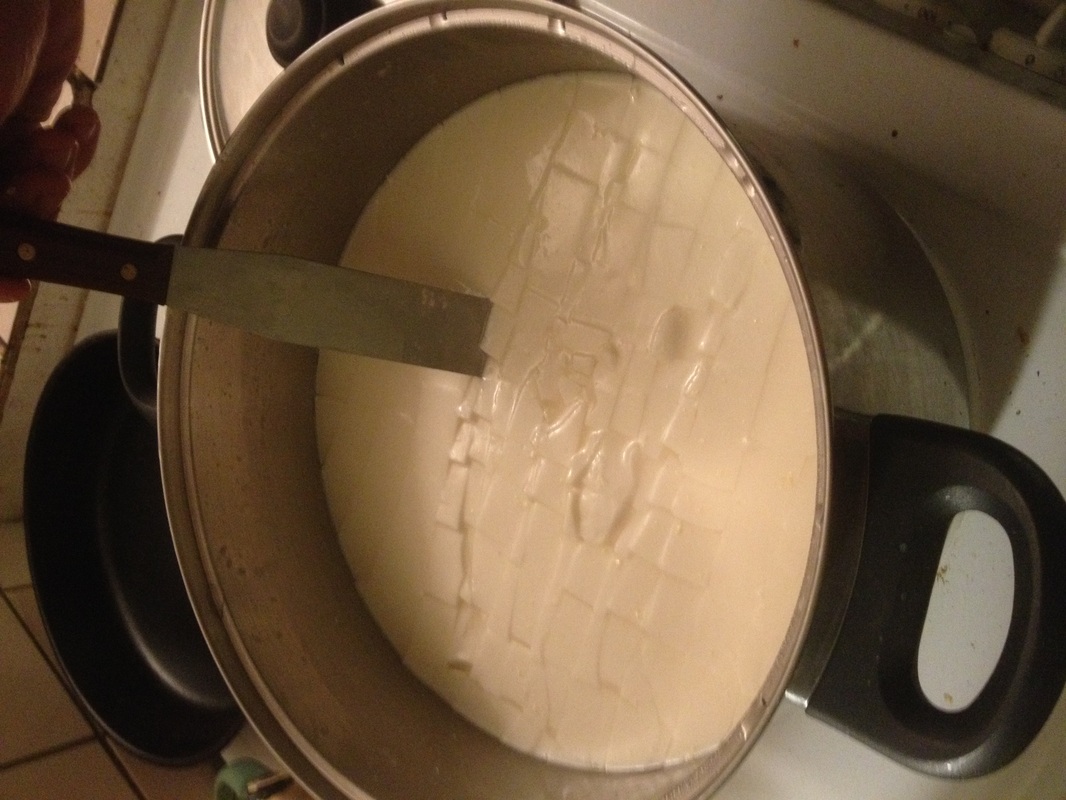 At this point you cut the curds into 1 cm blocks, then continue to cut again both directions with the knife at 45° which further reduces the size of the curd. Then you stir gently for 15 minutes and then let it all sit for another 15 mins to allow the curds to sink. 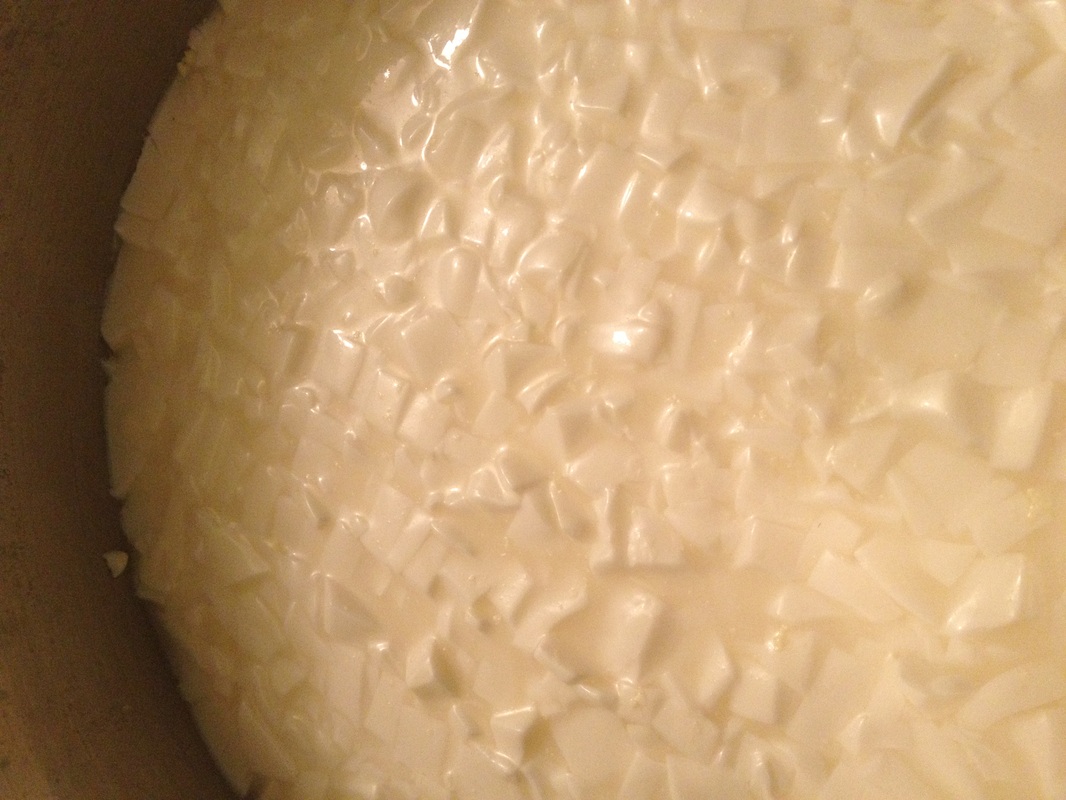 The excess whey is poured off and goes to the animals (just pour it off, no need to sieve) The curds are then ladled into moulds. We had to make do with what we had lying around in this case; 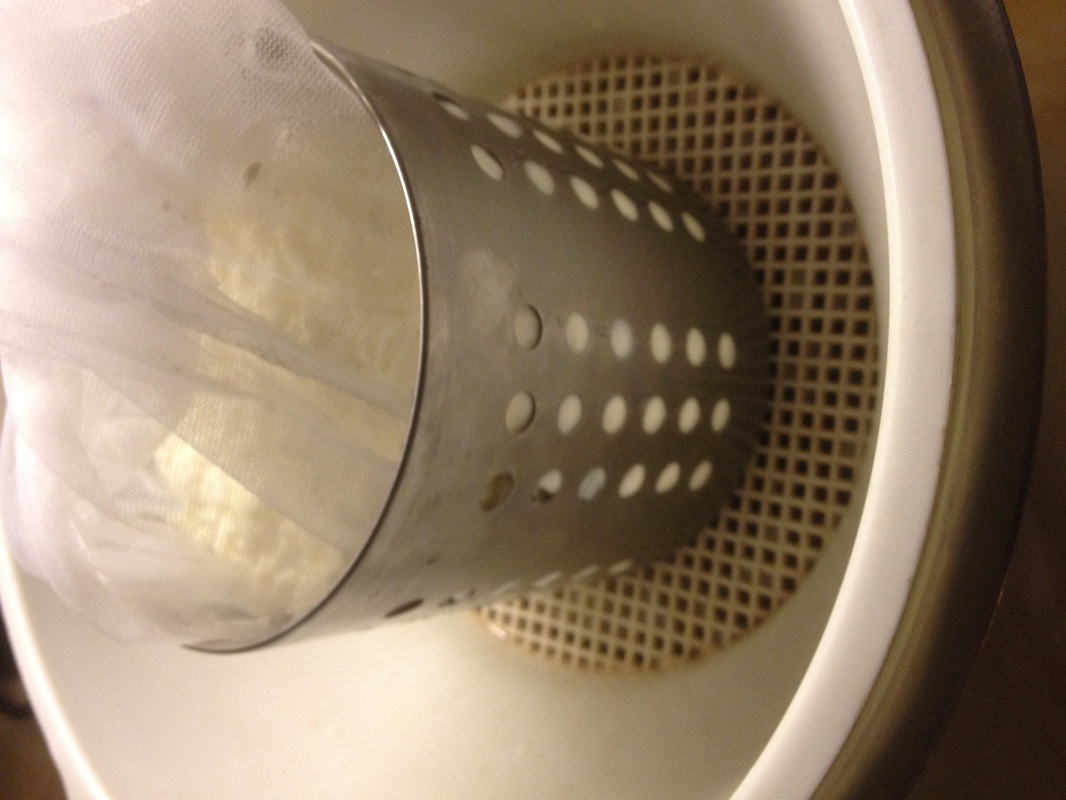 You can see the holes are too big so we added cheesecloth. Works fine. This is left for 1hr to drain at which point the cheese is flipped the other way up and left for another hour. You repeat this 4 times. 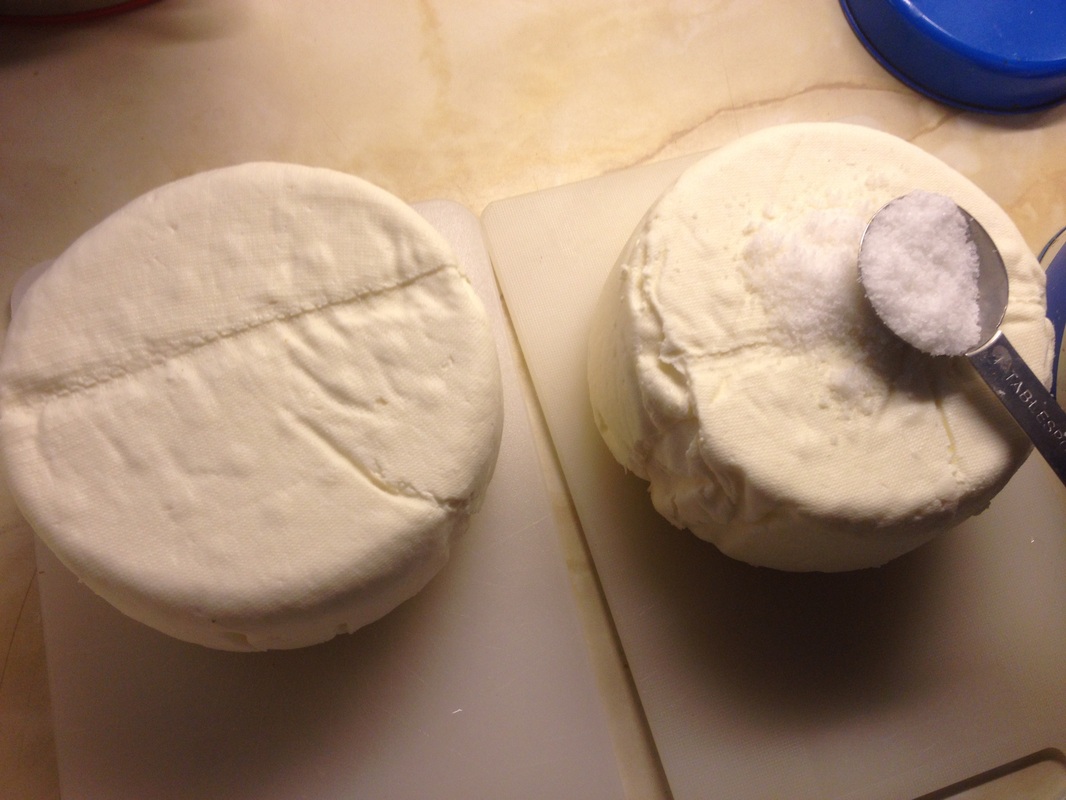 At this point if you had proper molds the cheese would be smooth. It is now time to salt the outside of the cheese liberally with good quality non iodized salt (who eats that anyway?!) You need to rub salt all over the surfaces. This protects the cheese and does not inhibit the white mould growth. 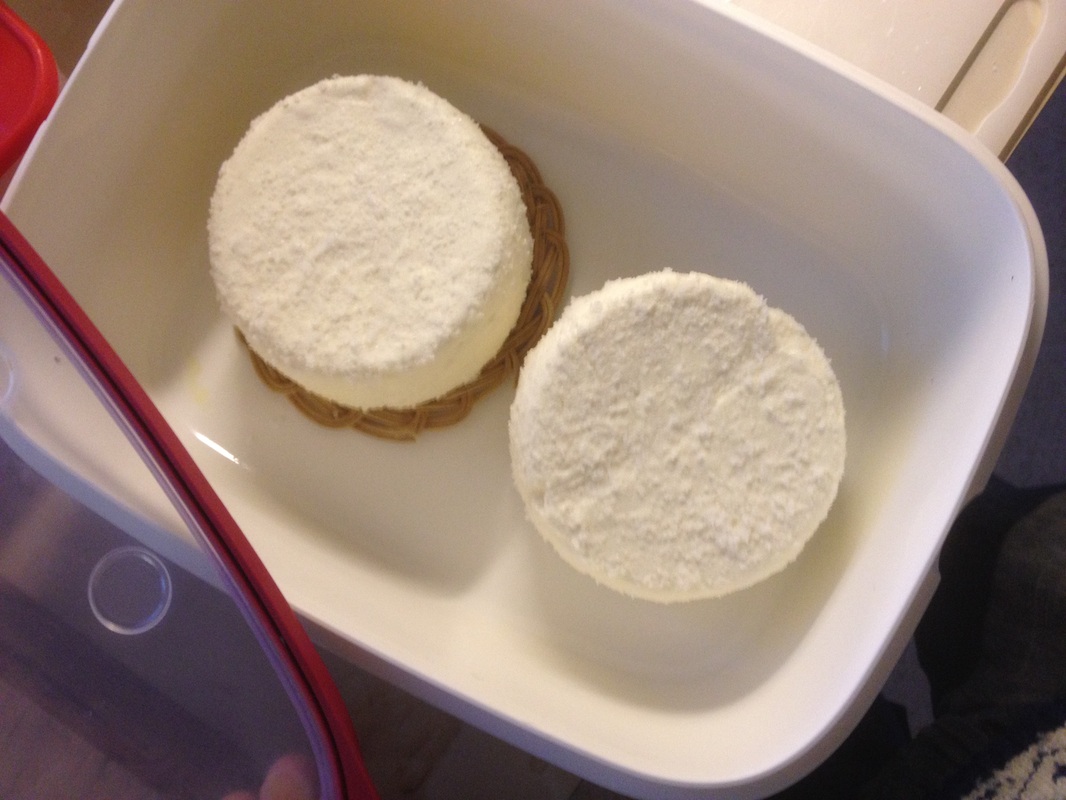 Now they are popped in the fridge inside a container and we will flip them over every day for the next 10 days until the white mould covers the cheese. Then the hard part; waiting 4- 6 weeks to taste these little beauties!
1 Comment
Leave a Reply. |
Like us on FB Below for regular updatesStay up to date with customized updates you want to receive

Upcoming coursesArchives
December 2016
Categories
All
|
 RSS Feed